 Web Hosting
 Windows HostingBuilt for Windows apps and websites – stability, speed and flexibility
 Reseller HostingLaunch a hosting business without technical skills or expensive infrastructure
 Affiliate ProgramRefer customers and earn commissions from sales across our platform
 Domain SearchFind and secure a domain name in seconds with our quick lookup tool
 All DomainsExplore domain names from over 324 TLDs globally – all in one place
 Free Whois Lookup Tool South Africa
 VPS
VPS SSLs
SSLsA website is an important part of doing business in the 21st century.
And WordPress is one of the most popular platforms for creating websites, used by 43.2% of all websites on the internet (w3techs 2022).
In fact, every two minutes roughly, another top 10 million site starts using wordpress.
Why?

Well, it is free and easy to use!
This article will provide a step-by-step guide on how to build a website on WordPress, specifically in South Africa.
It provides detailed instructions that consider factors specific to building and maintaining websites in South Africa, such as web hosting, content creation, customization, and security protocols.
Related: Top Blogging Sites in South Africa: Where to Get Started Right Now
Table of Contents
What is WordPress and What Does it Offer?
WordPress, the world’s most popular website-building platform, developed in 2003 by American blogger Matt Mullenweg and British blogger Mike Little, is an open-source content management system (CMS).
It offers a simple way for users to create and manage their websites without having to learn any HTML or coding.
Should You Use WordPress in South Africa?
To answer this question, let’s look at the pros and cons of WordPress.
Pros:
- WordPress is open-source, so it’s free to use.
- It has an easy-to-use interface and can be used by users with any level of technical skill.
- A huge variety of plugins are available, making it easy to add functionality to a WordPress website.
- It’s highly customizable, and there are plenty of themes available for users to choose from.
- An active community of developers provides support and advice for users.
Cons:
- Security can be an issue if the site isn’t properly maintained and updated regularly.
- It can be slow to load if the website is not optimized correctly or if too many plugins are installed/enabled on the site.
- Some plugins and themes are poorly coded and can cause conflicts with other parts of the website or create security vulnerabilities in the system.
- Site backups are essential but not always easy to manage within WordPress.
- While many themes are available, finding the right one for your specific needs can take time and may require some coding knowledge to customize.
Step One: Choose a Domain Name and Hosting Plan
Now that you know what you are getting into, let’s get right into the ‘how’.
i. Selecting a Domain Name
This is the #1 thing you need to build a website on WordPress in South Africa.
A domain name is an important part of creating a website, as it’s the address that visitors will use to find your site.
Before you can build and launch your WordPress website in South Africa, you’ll need to select a domain name that reflects your brand or business.
What does it look like?
Well, consider www.Truehost.co.za.
Here is what each part means.
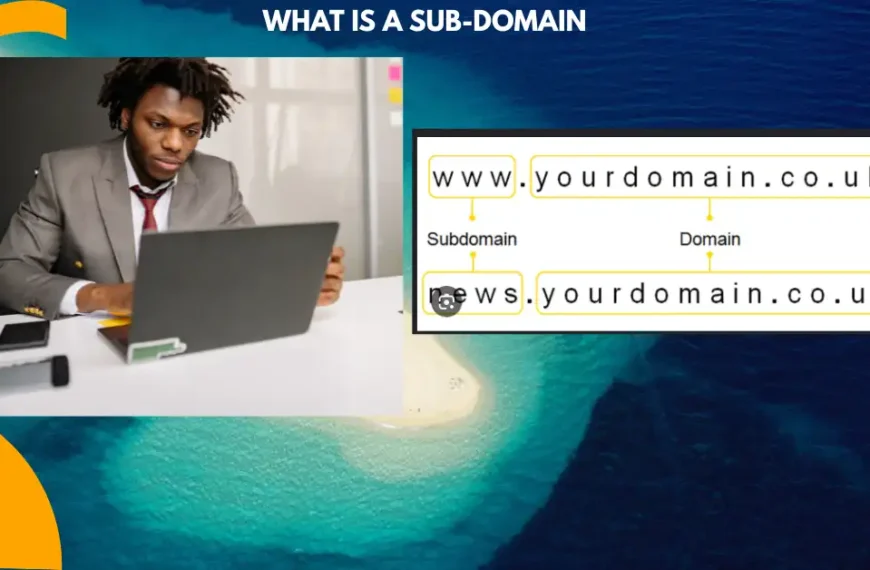
- Top-level domain (TLD): This is the last part of the domain name, such as “.com”, “.org”, or “.net”. There are also country-specific TLDs, such as “.za” for South Africa, “.ca” for Canada or “.uk” for the United Kingdom. TLDs are assigned by the Internet Assigned Numbers Authority (IANA) and are used to indicate the type of organization or geographical location associated with the website.
- Second-level domain: This is the part of the domain name that comes before the TLD, such as “truehost” in “truehost.co.za”. It is often the name of the organization or website.
- Protocol: This is not technically part of the domain name, but it is often included in URLs to specify the type of connection being used, such as “http://” or “https://”. It tells the browser how to communicate with the server hosting the website.
The parts you will be choosing are the second-level and TLD.
As you go about this, it’s best to keep it short and simple so visitors can easily remember it.
Also, try to make sure that the domain name is related to what you are selling or offering so people can know what they can expect when they visit your website.
For example, if you intend on selling clothes online, you can pick a domain such as fashionninja.co.za.
It’s also worth considering if having a keyword present in the URL may help with search engine optimization (SEO).
Finally, check for availability before committing – ideally on both .co.za and .com.
Here’s how.
Head over to https://truehost.co.za/ and click on Domains and then Domain Search.
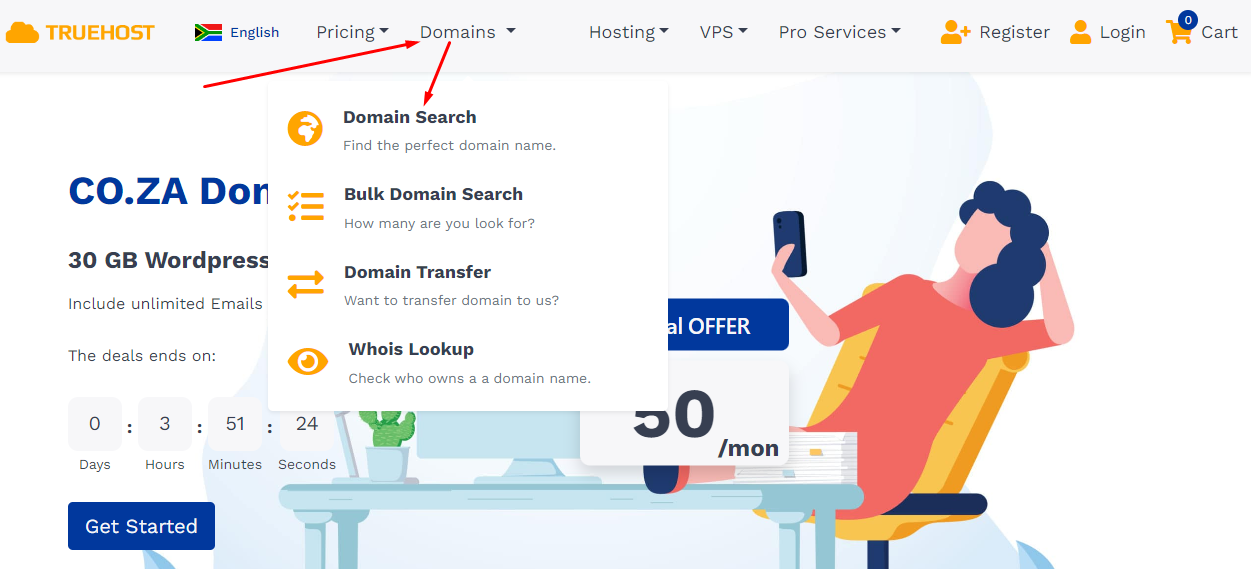
Enter your domain into the box as shown below.

And then hit search.
Truehost will search the database whether the domain you’ve provided is already registered by someone.
Turns out, no two people can register the same domain name.
This means, no one can register Facebook.com and claim it as their website name because Meta already owns it.
Get the idea?
If you are lucky, your domain will be available.
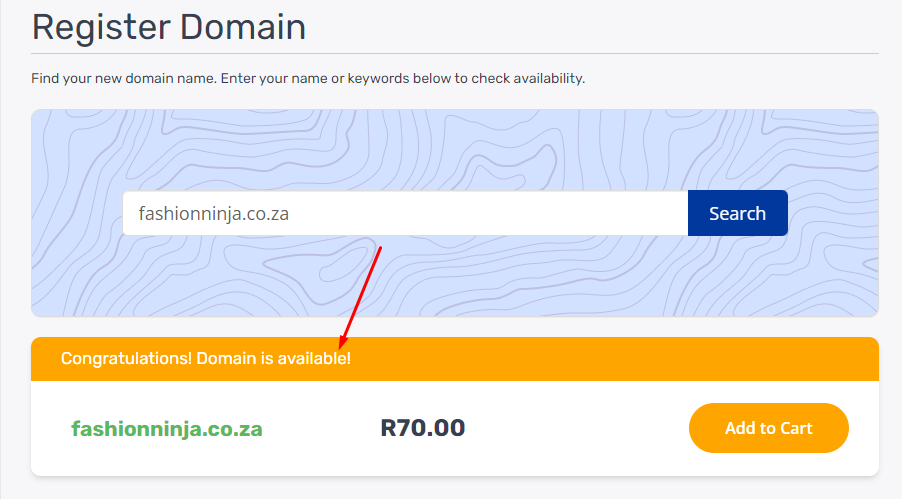
This means you can proceed to claim it as your own.
But if it shows you something like this:
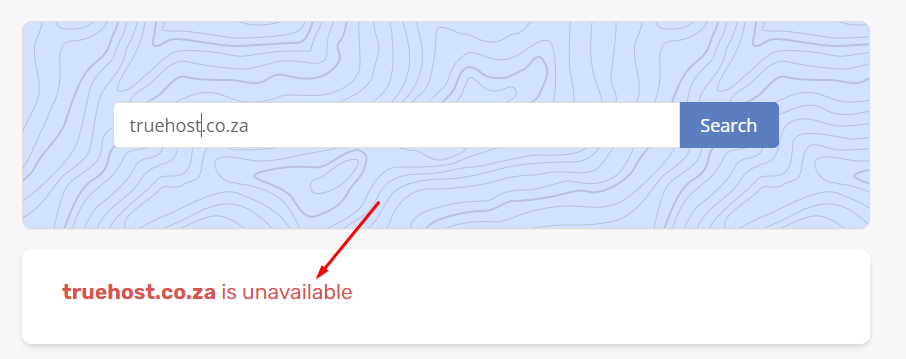
Search for another domain name.
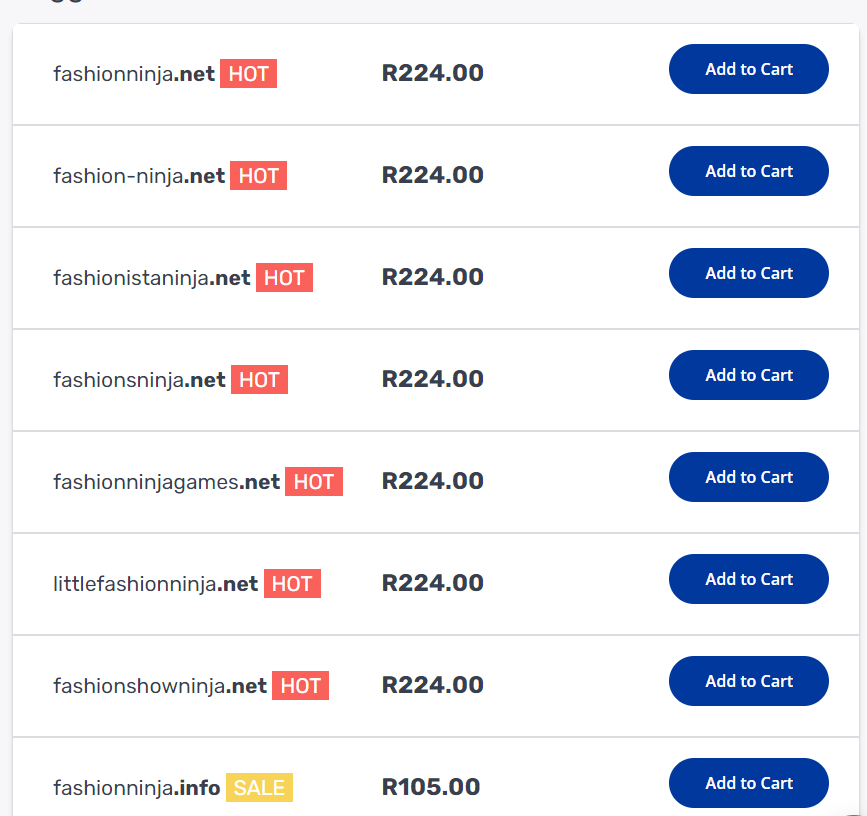
Once you have an available domain, check the price (R70 per year for a .co.za domain) proceed to add it to the cart, and then checkout.
Alternatively, you can browse through other suggested domains by scrolling down the page.
When you click ‘checkout,’ this is what you will see?.
What does it mean?
To answer this question, we have to move to the next step of how to build a website on WordPress in South Africa.
Related:
- Choosing a Domain Name: What Extension and Name is Right For You?
- Most Popular Domain Names in South Africa (Extensions)
- How To Perform Domain Name Search in South Africa Fast
ii. Choosing a Hosting Plan
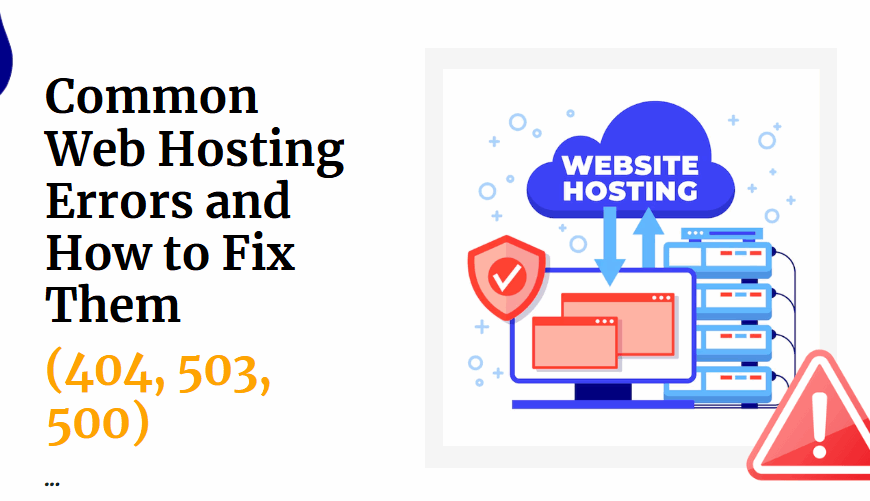
Web hosting is the physical storage of data on servers that allow your website to be accessible online.
It includes the infrastructure necessary for your website’s files, images, databases, and other components.
In short, without it, your website won’t be accessible online!
Now, before we talk about how to get it there’s something you need to know.
There are several types of hosting plans available depending on how much traffic you anticipate for your website and how much storage space you need.
Shared hosting is generally the most cost-effective option as it shares resources among multiple sites hosted on a single server.
Dedicated server plans allocate more resources per user, while VPS (Virtual Private Server) plans offer features such as software installation and custom configurations that may not be available with shared or dedicated servers.
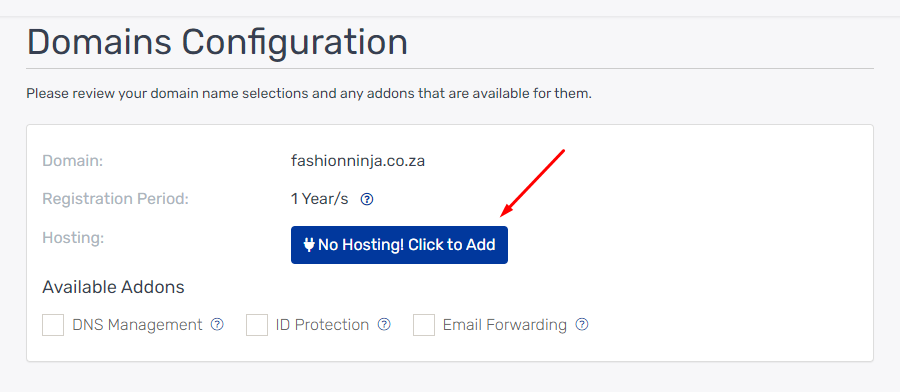
So, remember where we left registering our domain name?
Here?

To get hosting, click ‘NO HOSTING!’
And then go through the available packages to pick the one you like.

The cheapest web hosting package goes for R50 per month and gives you 30GB SSD storage space, unlimited bandwidth, and you can host up to 3 sites under one account.
If you want more features, consider higher plans.
You can also check our VPS packages.
Once you’ve picked your hosting package, your cart should look something like the one below.
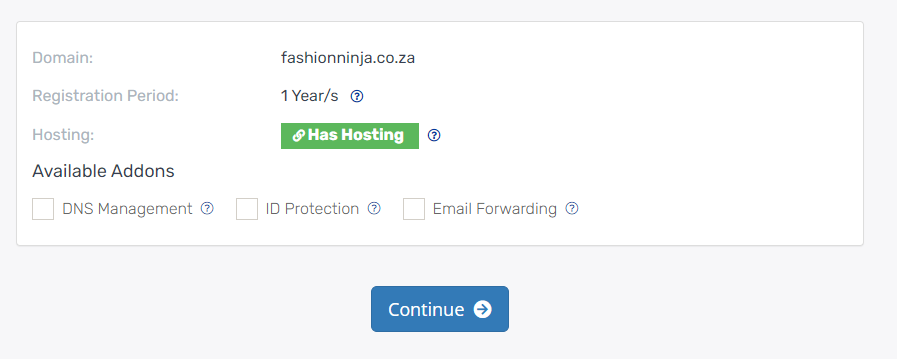
See?
It has hosting now.
Click ‘continue’ to pay for your order.
Once paid, what next?
Related: WordPress Hosting in South Africa (Is it Worth It in 2023?)
Step Two: Installing WordPress
Now that you have the domain and hosting, let’s install wordpress, shall we?
i. Accessing Your Hosting Account
Before you can install WordPress on your hosting account, you must first access your hosting account.
To do this, follow these steps:
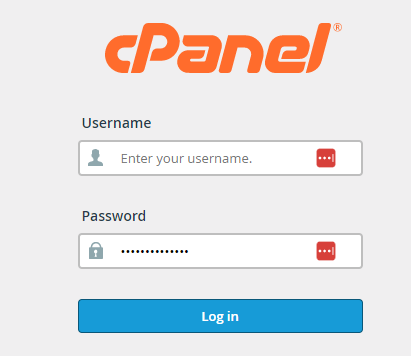
First, find an email sent to you by the hosting provider.
It contains cPanel details you will need to manage your hosting account.
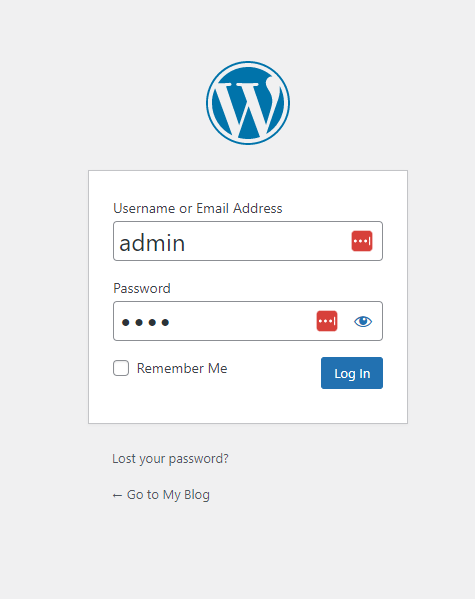
Sign in using the credentials provided when creating your account.

Once logged in, you will find all the options available for managing your hosting plan.
And that includes a tool you can use to install WordPress with just 1-click!
ii. Installing WordPress
Here are the general steps to install WordPress using cPanel:
- Log in to your cPanel account.
- Navigate to the “Softaculous Apps Installer” section.
- Click on the WordPress icon.
- Click on the “Install Now” button.
- Choose the domain name where you want to install WordPress.
- Fill in the necessary details such as site name, description, username, and password.
- Choose your preferred language and the default WordPress theme.
- Click on the “Install” button to start the installation process.
- Wait for the installation to complete.
Once the installation is complete, you can log in to your WordPress dashboard and customize your website.
Step Three: Setting Up Your Website
Once you’ve successfully installed WordPress on your domain, it is time to make it truly your own.
i. Select a Theme
A theme is a set of files that determine the visual layout and design of your website.
It can include template files, stylesheets, images, and other assets necessary to create the design of your site.
Selecting a theme is an important part of building a website on WordPress in South Africa as it determines how visitors will experience and interact with your site.
So, when choosing a theme for your WordPress website, there are several considerations to make, such as color scheme, typography, page layout options, and functionality features like portfolios or contact forms.
It’s also important to note that you can customize the look and feel of any theme by adding CSS code or customizing settings with plugins.
Luckily, many free themes are available from the official WordPress Theme Directory or through third-party providers like ThemeForest.
To find and install a theme, follow these steps:
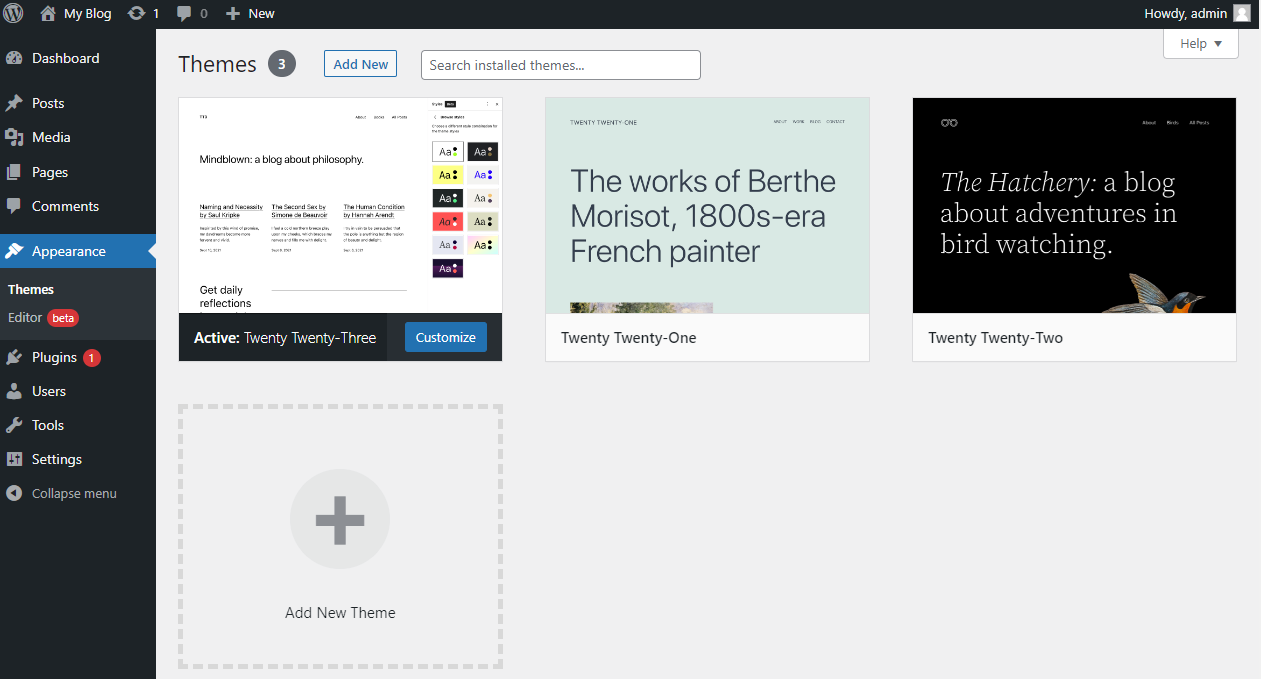
- Log in to your WordPress dashboard.
- Navigate to the “Appearance” menu and click on “Themes”.
- Click on the “Add New” button at the top of the page.
- You can choose to upload a theme or search for a theme from the WordPress repository.
- To upload a theme, click on the “Upload Theme” button, then select the theme file from your computer, and click on “Install Now”.
- To search for a theme from the WordPress repository, enter the theme name or keyword in the search bar, and click on “Search”.
- Once you have found the theme you want to install, click on the “Install” button.
- After installing the theme, click on the “Activate” button to make it live on your website.
Related: How to Choose the Perfect WordPress Theme
ii. Customize the Theme
Once you have chosen the theme for your WordPress website, it is time to customize it so that your site looks unique.

Luckily, WordPress provides you with a wealth of customization options, from changing colors and fonts to adjusting the layout and more.
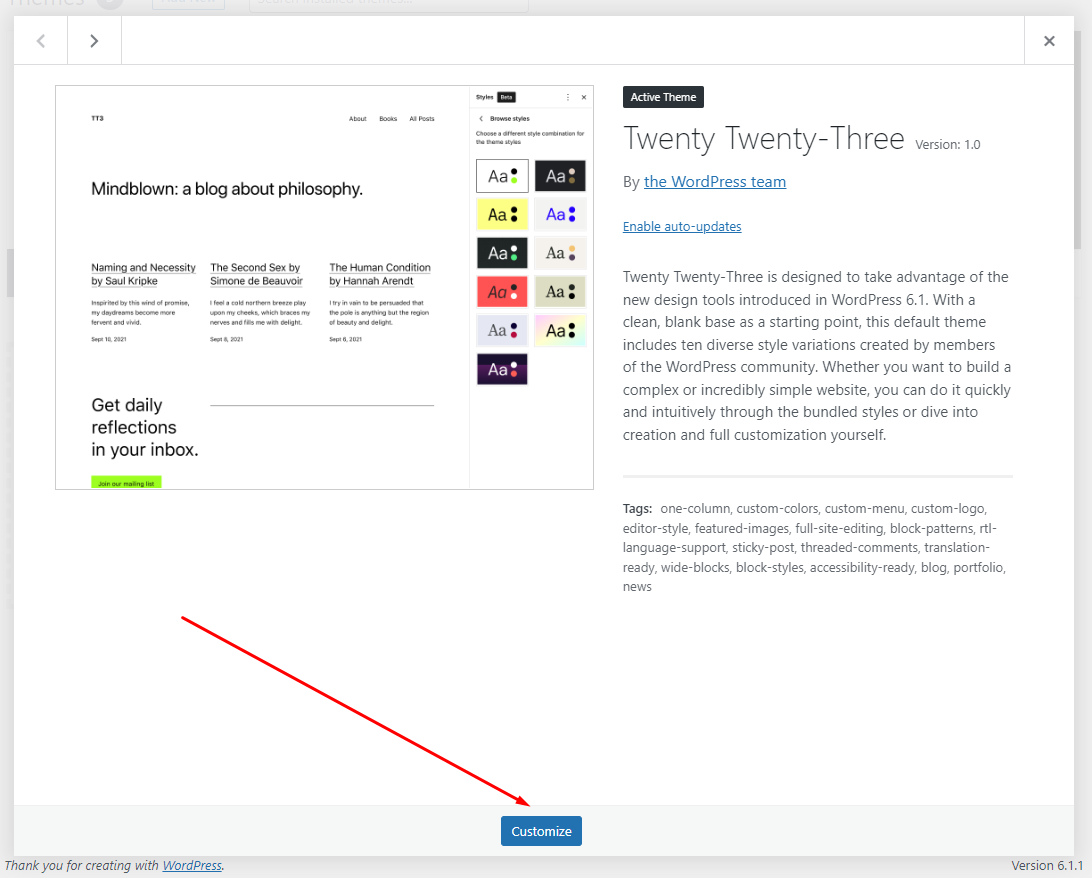
The easiest way to customize your theme is through the Theme Customizer tool, which can be found under “Appearance” in the left sidebar of your dashboard.
This tool allows you to make changes to various aspects of the theme’s design such as background color, header image, menus, and widgets all from one place.
If you are not sure how to use this tool or want more advanced customization options, there are a number of plugins available that allow for greater control over different parts of your site’s design.
Related: How To Design A Beautiful WordPress Site In South Africa
iii. Add Pages
Adding pages to a WordPress website is an easy task that requires no coding knowledge or any other special skills.
Pages are different from posts in that they are static, which means the content of the page remains unchanged unless you edit it manually.
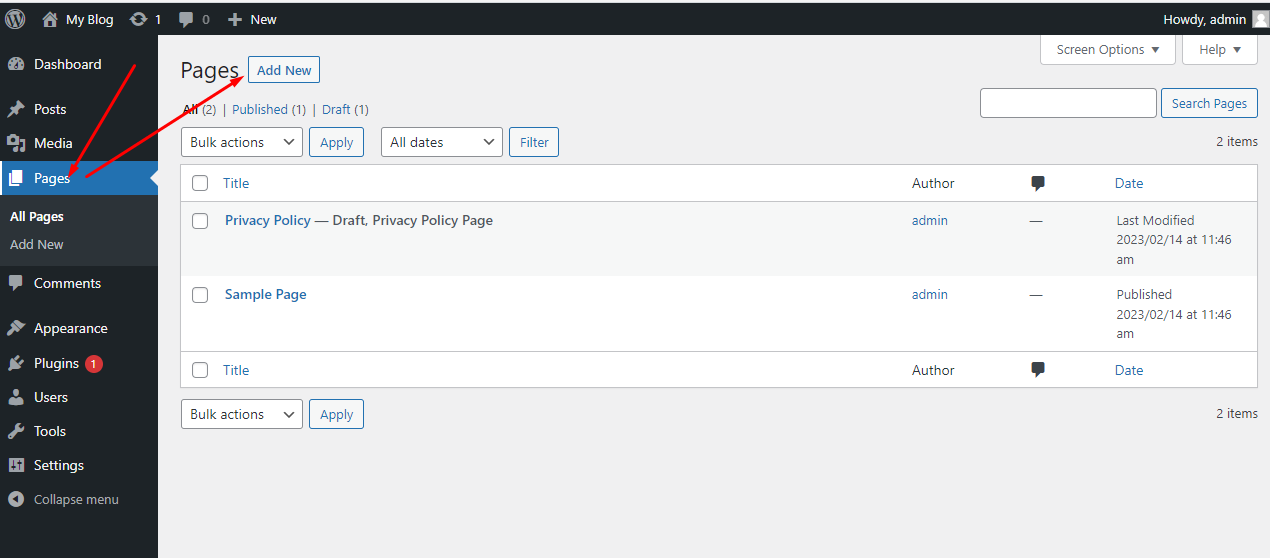
To add a page, start by logging into your WordPress dashboard and selecting Pages > Add New.
Then, give your page a title and then type out the content you want to include on it.
You can also apply blocks such as images, videos, and audio files to make your page more interesting.
Here is a list of essential WordPress pages that are commonly used on most websites:
- Home Page: The first page visitors see when they land on your website.
- About Page: A page that provides information about your company or organization.
- Contact Page: A page that includes your contact information, such as your email address, phone number, and physical address.
- Services/Products Page: A page that highlights the services or products you offer.
- Blog: A page that features your latest blog posts.
- Testimonials Page: A page that showcases feedback and reviews from your clients or customers.
- Portfolio Page: A page that displays your previous work or projects.
- FAQ Page: A page that answers frequently asked questions about your business or services.
- Privacy Policy Page: A page that outlines how you handle user data and privacy.
- Terms and Conditions Page: A page that defines the rules and regulations for using your website or purchasing your products/services.
Once you have finished creating your page, click the Publish button at the top right corner of the screen to make your page live for visitors to see.
iv. Add Plugins
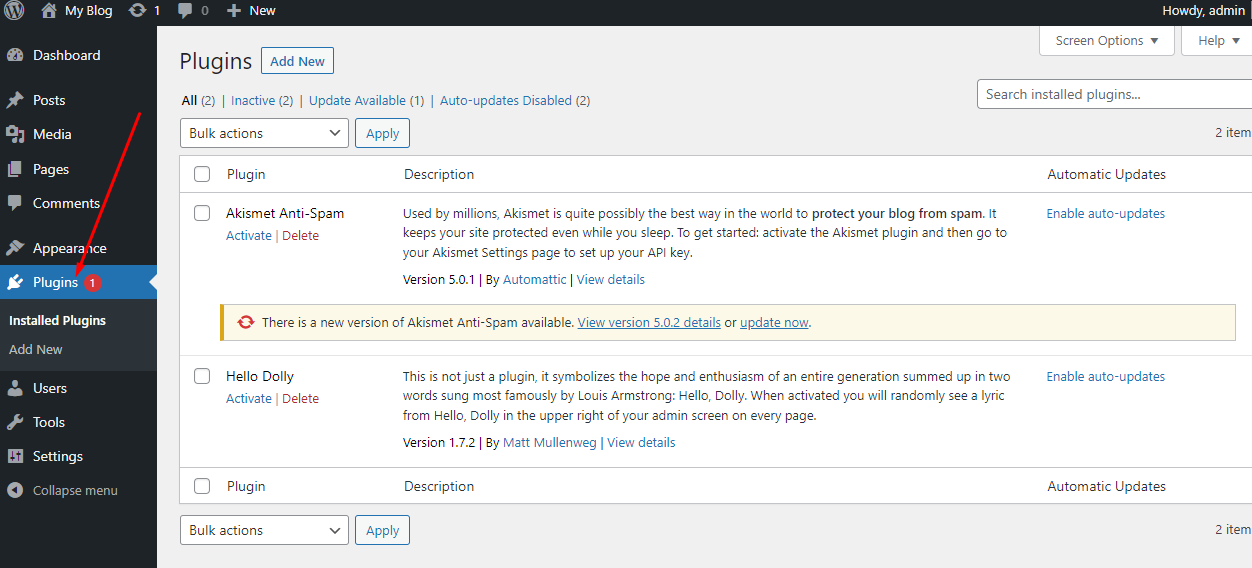
Plugins are tools that add extra features to your WordPress site, such as contact forms, shopping carts, and photo galleries.
With the vast array of plugins available for WordPress in South Africa, it’s easy to find the ones that best suit your needs.
To begin adding plugins to your WordPress site, you will need to log in with your username and password.
Then navigate to the ‘Plugins’ section of the menu on the left side of your dashboard.
Here you will find a list of all available plugins along with their ratings and descriptions.
Once you have located a plugin that fits within your needs click ‘Install Now’ followed by ‘Activate Plugin’ once the installation is complete.
Here is a list of essential plugins for most WordPress websites:
- Yoast SEO: A plugin that helps you optimize your website for search engines.
- Jetpack: A plugin that provides security, performance, and marketing tools for your website.
- Contact Form 7: A plugin that allows you to create and manage contact forms on your website.
- UpdraftPlus: A plugin that provides backup and restoration options for your website.
- W3 Total Cache: A plugin that helps improve website performance and speed.
- Akismet Anti-Spam: A plugin that helps protect your website from spam comments and form submissions.
- WPForms: A plugin that allows you to create customized and mobile-friendly forms.
- WooCommerce: A plugin that turns your website into an online store, allowing you to sell products and services.
- MonsterInsights: A plugin that helps you track and analyze your website traffic.
- Social Media Share Buttons & Social Sharing Icons: A plugin that allows visitors to share your content on social media.
Step Four: Adding Content to Your Website
Now, your WordPress website in South Africa is up and running!
What’s remaining is content.
Posting content to your website is a key step in creating a successful site.
There are several types of content that you can post on your website, such as:
- How-to guides and tutorials: step-by-step instructions on how to do something or solve a problem.
- Listicles: lists of tips, tools, resources, or products related to a specific topic.
- Reviews: honest reviews of products or services related to your niche or industry.
- Case studies: an in-depth analysis of a real-world scenario or project.
- Infographics: visually compelling and informative graphics that present data and statistics.
- Interviews: Q&A sessions with experts, influencers, or other individuals in your industry or niche.
- Personal stories: personal experiences or anecdotes that relate to your niche or topic.
- Video content: engaging and informative videos that explain or demonstrate something related to your niche.
- Trend analysis: analysis of current trends in your industry or niche.
- News and current events: coverage of current news and events related to your niche.
And depending on the purpose of your website, it may be beneficial to post multiple types of content.
Here are some tips for deciding what type of content you should post:
Think about who your target audience is and what they want.
Posting relevant, engaging content tailored to the interests and needs of your audience will help keep them coming back for more.
Consider adding educational resources or offering helpful advice to provide value to readers.
Having regular updates also helps attract visitors to stay engaged with your site and encourages them to return often.
Try posting new blog posts or articles on a weekly basis if possible.
i. Creating Posts and Pages
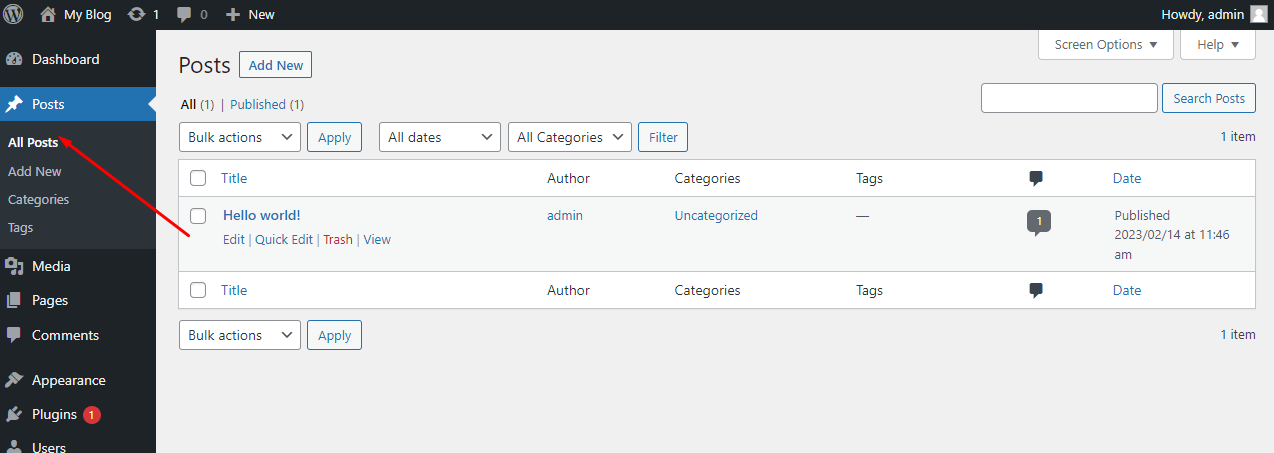
So you’ve picked a topic and even crafted a few pages, now what?
Follow these steps to publish it?
- Log in to your WordPress dashboard.
- Navigate to the “Posts” or “Pages” menu in the sidebar, depending on which one you want to publish.
- Click on the “Add New” button at the top of the page.
- Enter a title for your post or page in the text field at the top of the page.
- Enter your content in the main editing area. You can use the formatting tools in the toolbar to format your text and add media, such as images or videos.
- Select a category for your post or page, if applicable.
- Add tags to help users find your post or page through search.
- Choose a featured image representing your post or page in search results and on social media.
- Preview your post or page by clicking on the “Preview” button to see how it will look to visitors.
- Click on the “Publish” button to make your post or page live on your website.
Note: Before publishing your post or page, make sure to proofread your content for spelling and grammatical errors.
It’s also a good idea to optimize your content for search engines by including relevant keywords and meta descriptions.
And guess what?
You can schedule your post or page to publish at a future date and time or save it as a draft if you’re not ready to publish it yet.
ii. Adding Images and Videos
Images helps make your content interesting to read and tends to rank well on search engines.
Above all, only add relevant images and videos.
If your post is talking about the best beauty products, including images of those products under each subheading!
As for a video, you can include a video of the products to add value to your post.
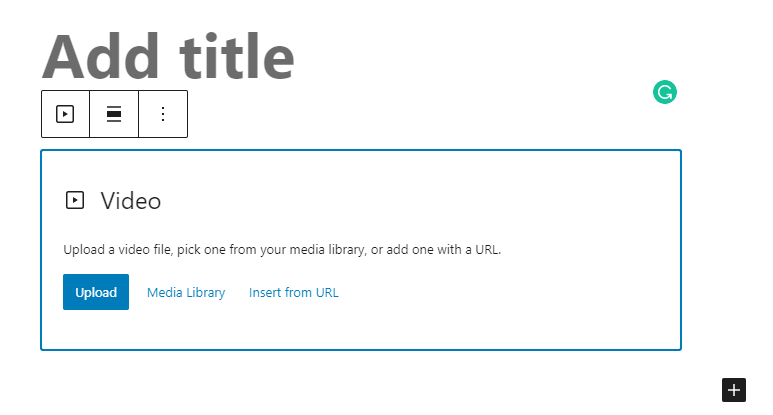
Now, to add an image/video, click on the (+) icon in the editing area to add a new block, then select the “Image” or “Video” block from the dropdown menu.
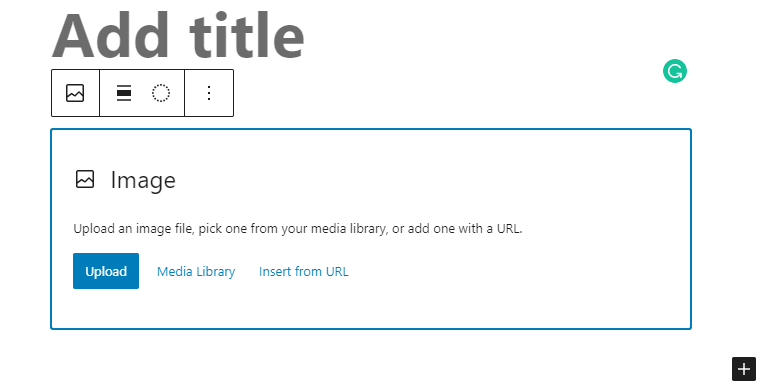
Either upload a new photo or select one from your media library.
Click on the “Upload” or “Media Library” tab, depending on where your image is located, and select the image you want to add.
If necessary, you can also edit the image by cropping, rotating, or resizing it using the editing tools.
As for the video, paste a link to a video hosted on a platform like YouTube or Vimeo.
iii. Adding Links
Links can be used to connect pages within the website, as well as direct users to different websites or resources.
There are two types of links that can be added: internal and external links.
Internal links connect different pages within the same website, while external links are used to point users toward other websites and resources outside of the main one.
The role of these kinds of links is fundamental for both
- SEO (Search Engine Optimization) purposes – making it easier for search engines like Google to crawl through a website –
- And user experience purposes – providing more information that might be useful or relevant when browsing through a particular page or post.
Step Five: Promoting Your Website
Now that you’ve published some content on your WordPress website, what next?
You need eyeballs!
Say what?
Yes, traffics is the lifeblood of a website.
Without it, your site is useless.
Here are some proven techniques to get people visiting and reading your content.
i. Search Engine Optimization (SEO)
Search engine optimization (SEO) is a key factor in creating and managing an effective website.
It helps potential customers to find your website on search engines like Google and Bing, making it easier for them to access your content or services.
As such, understanding what SEO is and how to use it is essential for any website owner in South Africa.
It is not that hard actually.
SEO consists of several strategies used to increase the visibility of a website online.
Here’s how to optimze your article for search engines.
- Choose a primary keyword: Identify a primary keyword or phrase that accurately describes the content of your post and that people are likely to search for.
- Include your primary keyword in your title: Make sure your primary keyword is included in the title of your post. Ideally, it should be placed at the beginning of the title.
- Use your primary keyword in your URL: The URL of your post should also include your primary keyword.
- Optimize your meta description: The meta description is the short summary that appears in search engine results. It should include your primary keyword and be written in an engaging way to encourage users to click through to your post.
- Use subheadings: Use subheadings (H2, H3, etc.) throughout your post to break up your content and make it easier to read. Include your primary keyword in some of your subheadings.
- Use your primary keyword in your content: Include your primary keyword throughout your content, but don’t overdo it. Aim for a natural-sounding usage, and use variations and synonyms of your keyword as well.
- Optimize your images: Use descriptive file names and alt text for your images that include your primary keyword.
- Interlink your content: Link to other relevant posts or pages on your website that supports the topic of your post. This helps search engines understand the structure of your website and can improve your site’s overall ranking.
If you can implement these strategies, you can boost your ranking in search engine results pages (SERPs).
And make it easier for users to find your site when they are searching for relevant keywords related to your business.
In addition, SEO helps build trust with search engines which can lead to higher rankings over time.
Consider installing an SEO plugin such as Yoast SEO or All in One SEO Pack, which can help you optimize your post for SEO.
It does this by providing suggestions for improvements and allowing you to set meta descriptions, titles, and other SEO-related settings.
ii. Social Media Marketing (SMM)
Social media is another great way to reach potential customers in South Africa.
Through it, you can create meaningful relationships with your audience, engage with customers, and share content quickly and easily.
Now, there are many different platforms available for SMM such as Facebook, Twitter, TikTok, Instagram, and LinkedIn.
Pick the right platform for your target market and use it to its fullest potential.
When creating an SMM strategy, define clear objectives and goals.
This will ensure that all efforts are focused on achieving these goals.
Also, identify what kind of content they want to create and how often they want to post it.
Such content should be tailored specifically for the target audience in order to maximize engagement levels.
And then measure the performance of each social media campaign.
You can easily do this by tracking key metrics such as website visits or follower growth over time.
Final Thoughts
So far, we have looked at a step-by-step guide on how to build a website on WordPress in South Africa.
This includes identifying and purchasing a domain name, selecting and purchasing web hosting services, installing WordPress software, launching the website, and setting up security measures for protection.
The benefits of building a website on WordPress in South Africa include;
- access to an immense library of themes and plugins
- Scalability
- easy integration with social media sites such as Facebook, Twitter, and LinkedIn
- support for multiple languages; powerful customization abilities
- streamlined content management systems
- user-friendly interfaces
- search engine optimization friendly features and enhanced security measures.
Building a website on WordPress is the perfect way to start an online business in South Africa.
Related: 13 Ways Bloggers Make Money in South Africa You Can Copy