 Web Hosting
 Windows HostingBuilt for Windows apps and websites – stability, speed and flexibility
 Reseller HostingLaunch a hosting business without technical skills or expensive infrastructure
 Affiliate ProgramRefer customers and earn commissions from sales across our platform
 Domain SearchFind and secure a domain name in seconds with our quick lookup tool
 All DomainsExplore domain names from over 324 TLDs globally – all in one place
 Free Whois Lookup Tool South Africa
 VPS
VPS SSLs
SSLsLast updated on February 25th, 2021 at 01:07 pm
Table of Contents
What does DNS Management mean?
DNS (Domain Name System) refers to a standard of assigning names to resources connected on network. The assignment of these names helps translate information on domain names to IP addresses easily understood on network protocols.
DNS management means ability to update DNS records on the database either manually or automatically.
Truehost Africa DNS records are subdivided into two that is external DNS records and internal DNS records. External DNS records refers to records provided by other service providers but used by Truehost clients. Internal DNS records refers to records offered by Truehost to connect to services offered by Truehost.

Example of External DNS may be a website hosted by Olitt.com while the email service is hosted by Truehost. That service may use nameservers for Olitt and redirect MX Record to mail Server on Truehost.
Example of Internal DNS is where all services are provided by Truehost, thus nameservers and associated records such as MX all are mapped to Truehost servers.
COMMON TYPES OF DNS RECORDS
Nameservers are primary DNS records that are used to assign a domain name to hosting service.
These nameservers are therefore offered by domain registrars and managed on client portal.
A RECORD:
A (Address mapping) records is an IP Address that links a hosting service to server which stores hosting information.
A records communicate on network protocols by responding to ping requests.

A Record are provided on Truehost Cpanel under Zone editor.
CNAME Record
CNAME (Canonical Name) Refers to a record that maps a subdomain content to main domain.
Usually website builders commonly use CNAME record to map domain names to them. Such examples include Olitt.com and Shopify .
CNAME records are available internally on Truehost Cpanel under DNS zone.
TXT Record
TXT records -are records responsible for holding text information linking to your domain name from other sources. Such may include a verification service for the domain, email records from emailproviders such as Zoho and microsoft office 365.
To update TXT records on Cpanel, go under DNS section on DNS zone editor.
MX Record
MX (Mail Exchange) records are DNS records used for connecting email services to a domain name.
Truehost supports both internal and custom MX records for owners who host emails with external providers such as ZOHO, Google- gsuite .
How to update DNS records on Truehost
How to update nameservers
Login on client area using the email address and password you set during domain registration
use link https://truehost.co.za/cloud/clientarea.php
Click Domains and select mydomains
Select domain name.
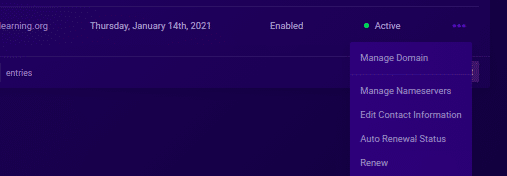
On drop down, select manage nameservers as shown below
Select custom nameservers and input new nameservers
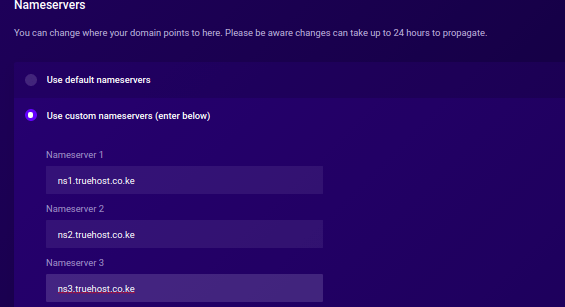
Click change nameserver button to save changes
How to add A record
Login to hosting cpanel using login details
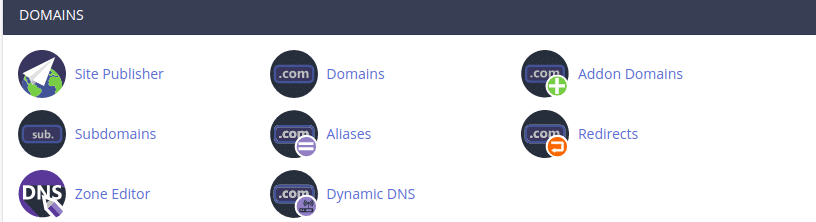
Go to domain section and select zone editor
Click manage option beside the domain name you wish to update
To add A record, click Add record option on right hand side

A table will appear as below

Fill in table with values below
Name: Fill in the domain name
TTL: Fill in the TTL value provided by your provider or use default value on table
Class Type: Ensure value selected is A
Record: Input the IP Address provided to you
Click Add record to save new values
It is also possible to edit existing A records by clicking Edit under actions
To delete A record, select delete under action
A confirmation message box will appear as below
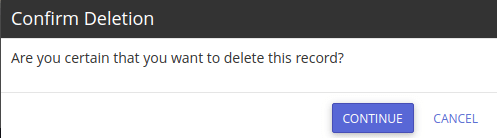
Click continue to complete deletion of A record.
If the delete action was an error, click Cancel to prevent deletion.
How to add CNAME
Log in to your hosting cpanel
Under the domain subsection , click Zone editor
Select manage on the domain name you wish to add the CNAME
Choose Add record and select CNAME as below

Fill in values for the record with those provided by Cname provider.
Name: Fill in the first CNAME value provided
TTL: Fill in the TTL value provided by your provider or use default value on table

Class Type: Ensure value selected is CNAME
Record: Input the CNAME Destination Value provided to you
Click Add record to save new values
To edit existing CNAME records,
Go to manage section
Select filter by CNAME as below

Existing CNAME values will be displayed.
Under actions, Click the Edit option on the CNAME you wish to edit
Input new CNAME values and click save record button
To remove existing CNAME , click Delete option beside the CNAME value you wish to remove
Click Continue on the confirm deletion window that appears.
How to Add TXT records
Login on your Cpanel and select Zone editor
Click manage and select Add record on top right hand as below
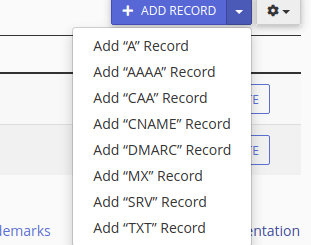
Select Add “TXT Record” and input TXT Values provided
A TXT table will appears as below

Name :fill in the domain name
TTL: fill in TTL Value provided or use default on the table
Class Type: Ensure TXT is selected
Record: Fill in value provided as TXT destination (value usually has = sign)
To edit TXT records
Click manage on the domain name you wish to edit
Filter by TXT values see existing TXT records
Select TXT record to be edited and fill in new values
To save changes,click Save record
To delete TXT Record
Filter by TXT values to see all TXT records
Select TXT Record to be removed, and click Delete option
Click continue on confirmation box that appears to remove record.
Click Add record button to save changes
How to Add MX Record
Go to hosting cpanel and login
Under domain section , select zone editor
Click Manage on the domain name
Click Add Record and select MX record
Fill in the table as below

Name: input domain name
TTL: input values provided; or use default
Class Type: Set it to MX
Priority: Input value provided by email provider as an integer
Destination: Input the provider’s destination name
Click Add record button to save these records
For multiple MX records, repeat the process until all MX records are updated
To edit MX Records
Return to manage DNS section as below

Filter by MX records
Click the MX record to be edited
Input new records
Click Save record for updates to be saved.
To remove existing MX records
Return to section for managing Records
Select Filter by MX and obtain the MX to be removed
Click delete option
Complete deletion by clicking continue on deletion confirmation box.
Secondary DNS records include those used for CDN (content delivery network) such as from cloudflare; CD Networks and Google cloud CDN.